Picture this: It's 7 PM on a Saturday. Your dining room is packed, tickets are flying, but your kitchen feels like a game of human Tetris. Your sous chef is doing lunges around the prep station, your expediter can't reach the pass without playing limbo under the heat lamps, and somewhere in the chaos, a perfectly good ribeye just hit the floor.
Sound familiar?
Most restaurant owners obsess over dining room aesthetics like the lighting, the Instagram-worthy corners, the perfect booth spacing. Meanwhile, their kitchen operates like a poorly designed maze where profit margins go to die.
Here's what the successful operators know: Your kitchen layout determines everything. Not just how fast you cook, but how much you make, how long your staff stays, and whether customers leave raving or never return.
The math is brutal but simple. A poorly designed kitchen wastes 2-3 minutes per order during rush periods. In a 200-seat restaurant turning tables twice nightly, that's 20 lost hours of productivity every single service. At Canadian labor rates, you're hemorrhaging $400+ daily just because your prep table is in the wrong spot.
Stop Building Around Pretty, Start Building Around Profit
Walk into any struggling restaurant and you'll find the same story: a beautiful dining room attached to a kitchen that looks like an afterthought. The owner spent months agonizing over chair fabrics but gave the prep area about as much thought as choosing Tuesday's special.
Your kitchen should command 30-35% of your total square footage, not the leftover space after you've maximized seating. Why? Because every square foot of smart kitchen design pays you back in speed, safety, and sanity.
Think of your best server during a slam. They don't zigzag randomly through tables, they follow invisible highways that get them from point A to point B without collisions. Your kitchen needs the same intentional flow, and it starts with understanding how food actually moves through your space.
The Assembly Line That Actually Works
Forget everything you think you know about "open concept" kitchens. The best commercial kitchens operate like well-oiled factories with distinct zones that feed into each other:
Zone 1: The Landing Pad
Your receiving area needs a sturdy work table where deliveries get broken down and sorted. Not your dining room floor, not a random corner, a dedicated stainless steel prep table where invoices get checked and products get routed to their next stop.
Zone 2: The Prep Command Center
This is where the magic happens before service even starts. Position your heavy-duty stainless steel prep tables in an L-shape or galley formation near your walk-ins and dish pit. Your morning prep cook should be able to grab ingredients, prep them, and slide finished mise en place to refrigeration without taking more than three steps in any direction.
Smart operators choose Zanduco's 24" Depth Heavy Duty Stainless Steel Tables with Undershelves here, the undershelf holds hotel pans of prepped ingredients while the top stays clear for active cutting work.
Zone 3: The Hot Line Theater
Your cooking line is a performance stage, not a storage closet. Each station needs breathing room, 48 inches minimum between your range and the prep table behind it. Any less and you're asking for burns, dropped plates, and frayed nerves.
Place a mobile stainless steel work table at each end of your line. Left side: clean plates and garnish. Right side: finished orders ready for runners. When the rush hits, your expediter becomes a conductor, not a traffic cop.
Zone 4: The Final Checkpoint
Your pass is where great food becomes great experiences. Install a dedicated plating station, a wood top table works beautifully here for its warmth and knife-friendliness. Position it so servers can grab orders without stepping into the cook's workspace.
The Hidden Science of Spacing
Here's what most restaurant owners get wrong: they measure for equipment, not for humans. A 6-foot prep table might fit the space on paper, but what about the person using it?
Canadian commercial kitchen codes require specific clearances for good reason:
- 42 inches minimum for single-cook aisles
- 48 inches minimum where two people work opposite each other
- 36 inches minimum around dishwashing areas
These aren't suggestions, they're the difference between smooth service and a dinner rush that feels like controlled chaos. Measure twice, install once, and thank yourself later.
Make Every Surface Earn Its Keep
In tight quarters, everything needs to multitask. Your stainless steel prep tables shouldn't just prep, they should store, stage, and transport.
Look for tables with adjustable undershelves that can hold sheet pans during prep and bus tubs during breakdown. Add locking casters to larger work tables so they can slide out for deep cleaning but stay put during heavy chopping.
Pro move: Install a wood top prep table near your dining room for carving roasts or finishing desserts. It's functional theater that justifies premium pricing while giving your kitchen visual warmth.
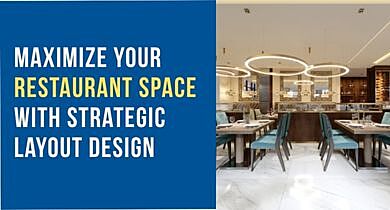
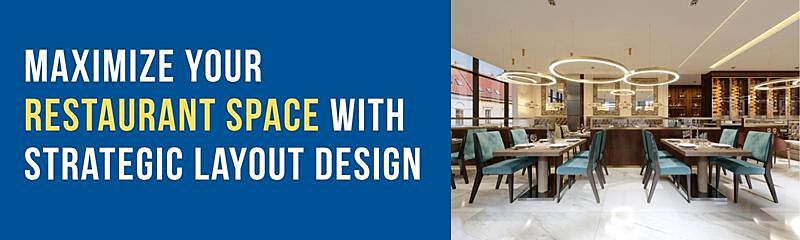
The Open Kitchen Advantage (Done Right)
Open kitchens sell experiences, not just food. But most operators do them backwards; they expose their messiest zones while hiding their most impressive skills.
Instead, create a "performance prep station" using a premium stainless steel table with a polished finish positioned where diners can watch final plating. Keep the raw prep, dishwashing, and storage hidden. Guests want to see the artistry, not the cleanup.
Position this showcase table at least 42 inches from any guest seating, close enough for engagement, far enough for safety and health codes.
Future-Proof Your Investment
Restaurants change. Menus evolve. Staff turnover happens. Build flexibility into your layout from day one.
Choose modular work tables that can be reconfigured as your needs shift. Zanduco's All Stainless Steel Worktables work anywhere, be it prep station, plating area, or backup service table during private events.
Install utility connections (gas, water, electric) in more locations than you currently need. Adding a prep sink later costs $3,000. Adding a prep sink rough-in during construction costs $300.
Think phases, not perfection. Start with bulletproof basics like proper spacing, quality work tables, and logical flow, then add sophistication as revenue grows.
The Bottom Line That Actually Adds Up
A kitchen-first layout isn't about moving furniture around, it's about engineering profit into every square foot. When your team can work smoothly, they stay longer. When orders fly out faster, you turn more tables. When your space looks intentional, customers pay premium prices.
The restaurants thriving in Canada's competitive market aren't the ones with the fanciest dining rooms. They're the ones where a perfectly planned kitchen makes everything else possible.
Your next busy Saturday is coming. The question is whether your team will be dancing through a choreographed workspace or playing kitchen Tetris with your profit margins.
Ready to transform your kitchen layout? Explore Zanduco's complete collection of stainless steel work tables, from heavy-duty prep stations to elegant wood-top finishing tables. Because great restaurants start with great foundations and yours starts in the kitchen.
Frequently Asked Questions
How can I design a restaurant floor plan that balances customer experience and staff efficiency?
Put the host stand and bar at the door. Lead guests past a mix of booths and tables. Keep servers on straight paths by placing service stations right next to the kitchen. Fewer steps means faster service and happier customers.
What are the best strategies to maximize space in a small restaurant layout?
Use banquettes with storage underneath and slim tables. Hang shelves on walls. Paint light colors and add mirrors to open up the room. Skip big decorations that take up space.
How do I create functional zones in my restaurant layout for better workflow?
Divide your space into entrance, dining, bar, service station, and kitchen. Mark each zone with different flooring or lighting. Put service stations on the edges so staff don’t cut through diners to restock.
What seating arrangements optimize capacity without sacrificing guest comfort?
Line walls with two-tops and booths, group four-tops in the center, and add a few counter seats. Leave at least 24 inches between chairs and 18 inches of table edge per person. Use corner booths to fit extra seats.
How important is kitchen placement in maximizing restaurant space?
Very. A kitchen along a back wall or in the center cuts steps by up to 30%. Avoid long hallways, shorter routes get food out faster.
What role does strategic bar placement play in restaurant layout design?
Place the bar by the entrance or between seating areas to catch guests as they arrive. Use an L-shape or curve for more stools. Make sure bartenders have at least three feet behind the bar to move.
How can digital tools help in creating an optimized restaurant layout?
Drag and drop tables and equipment in 3D planning software to see what fits. Run simple flow tests to find tight spots. Use virtual walkthroughs to spot problems before you buy anything.